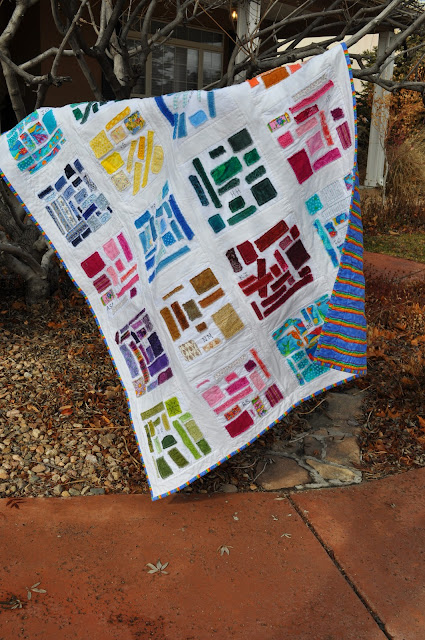
This is such a fun and do-able project for little hands.
1) Pre-cut random rectangles and squares from scraps. Cluster about 15 scrap pieces in each baggie. Because this was a Color Wheel class, each baggie was a colorstory.
2) Give each child a Kona White layer cake piece. Use painter's tape to temporarily tack the layer cake piece corners to their desktops.
3) Give each child a water soluble glue stick. Coach the students to use a single swipe of glue, please. :)
4) Guide them to leave a narrow space between each piece (so the white will "pop").
5) Using a sharpie, fine tip, write the initials of each artist on their square. Collect their creations and head home to sew!
6) Cut batting pieces 16x16. Center the glued blocks over the batting and stitch each scrap 1/4" from all edges. So each block will be quilted and ready to be assembled into a quilt.
7) Layout your quilted squares in an appealing pattern. Using a Jelly Roll cut 10" strips for the some of the sides of each block (depending on where that block fits within the quilt layout). Stitch block, strip, block, etc for each row; sewing "inner" borders only, "outer" borders will be long strips added last. Measure your rows' lengths and cut joining strips and a top and bottom strip for the quilt.
8) Create the backing, stitch in the ditch along the jelly roll seams to attach the front to the backing.
9) Launder several times, pulling/cutting the threads off the fraying edges. You want them to fray and have soft edges.
9) Launder several times, pulling/cutting the threads off the fraying edges. You want them to fray and have soft edges.


7 comments:
Awesome quilt project for those adorable second graders!
I have a question about step #7: Do you launder the block before it has any backing? Doesn't the batting get all over the place? I use Warm and Natural, and I never attempted to wash it before it was hidden inside the quilt. I'm learning something new!
Karen
Wonderful school project, by the way! I love it.
Wowzers, you are right. The multiple washings & dryings are the last step. I, also, use Warm & Natural (or White.)
Karee
An amazing project with so much visual impact. I love that you gave the kids so much creative freedom on this! I'm sure they learned a lot about color!
An amazing project with so much visual impact. I love that you gave the kids so much creative freedom on this! I'm sure they learned a lot about color!
What a great project! Thanks for sharing.
Post a Comment